Sterling Home Inspections
  • Home
  • About
  • Services
    • Inspection Overview
    • Your Report
    • For Agents
  • Testimonials
  • Blog
  • Helpful Info
  • Schedule a Home Inspection
  • Click to open the search input field Click to open the search input field Search
  • Menu Menu
Home Inspection, Real Estate, Uncategorized

Is My Range In Danger Of Tipping Over?

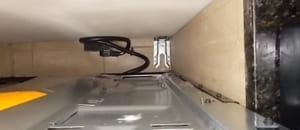
The answer is it might be if its not properly fastened in place.  Say what now? I didn’t know my range needed to be fastened in place.  Unfortunately, in most cases neither did the installer.  Anti-Tip brackets come with every range, but most are thrown away without being installed.  But don’t worry if your range doesn’t have them, it’s a simple fix.  this can be done without much trouble by installing an ‘anti-tip’ bracket behind the range.  Often times your home inspector will check to see if one is installed. Below is a picture of a typical slide in range anti-tip bracket.

Anti-Tip Bracket for GE Range

WHAT IS AN “ANTI-TIP” BRACKET ANYWAY?

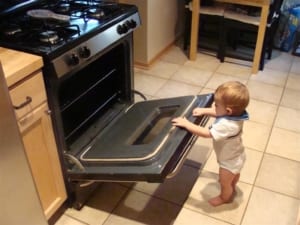
An anti-tip bracket is a small clip that attaches to the wall or floor behind the range and prevents it from tipping over.    According to the Consumer Product Safety Commission (CPSC) there were around 38 fatalities associated with ranges tipping over in the years between 1980 and 2008, and far more injuries in addition to that number.  The fatalities were divided among children between one and 5 years old and elderly adults using the open range door for support.  If the range tilts forward and hot water or oil falls onto a child, it could be a disaster.  One of my friends had this happen to him with bacon grease and I don’t want to see it happen to anyone else.  In response to this danger, the American National Standards Institute (ANSI) and Underwriters Laboratories (UL) created standards in 1991 that require all ranges manufactured after that year to be capable of remaining stable while supporting 250 pounds of weight on their open doors. Manufacturers’ instructions, too, require that anti-tip brackets provided be installed.

Child at Range

IS AN “ANTI-TIP” BRACKET REQUIRED?

While anti-tip brackets are not referenced directly in the building code they are required by the manufacturer.  The building code states “General. Equipment and appliances shall be installed as required by the terms of their approval, in accordance with the conditions of the listing, the manufacturer’s installation instructions and this code”.  In other words, if the manufacturer has recommended it as part of their installation, then it must be installed.


HOW DO I KNOW IF ONE IS INSTALLED ON MY RANGE?

You might be able to see the bracket by looking behind the range with a flashlight, but some floor mounted brackets are hard to see from this angle.  Some ranges have removable drawers or as space between the range and the floor that will make it possible to see if one is installed.   The other way to test if one is installed is to carefully tip the range forward. It will only tip forward slightly if the range is properly secured in place. Make sure to remove everything from on top and inside the range before you attempt this.  There are many different types of ranges, but as far as I know all of them require an anti-tip bracket.  Different ranges have different brackets so look for one by make and model number of your range.

Range Anti Tip Bracket Installed

I DON’T HAVE ONE – WHAT SHOULD I DO NOW?

Anti-tip brackets are available from the manufacturer, big box stores, online and sometimes at appliance stores.  They only cost a few dollars and simply get screwed in place.  The range does need to be moved out of the way to do this, so make sure if you are doing this yourself you have an assistant and also make sure to protect your floors from damage because stoves are heavy and can easily damage wood floors.

Additional Resources:

Range Tip over Safety Alert

CPSC Tip over Report

CPSC Free Standing Ranges

December 27, 2018/0 Comments/by alansinger
https://www.sterlinghomeinspections.com/wp-content/uploads/sites/57/2018/12/Anti-Tip.jpg 225 295 alansinger https://d3bfc4j9p6ef23.cloudfront.net/wp-content/uploads/sites/57/2018/11/07195401/logodark.png alansinger2018-12-27 17:45:312023-12-29 18:21:29Is My Range In Danger Of Tipping Over?
Uncategorized

7 Things Your Inspector Wishes you Knew

February 22, 2016/1 Comment/by alansinger
https://www.sterlinghomeinspections.com/wp-content/uploads/sites/57/2016/02/static1.squarespace.com_.jpg 725 776 alansinger https://d3bfc4j9p6ef23.cloudfront.net/wp-content/uploads/sites/57/2018/11/07195401/logodark.png alansinger2016-02-22 01:43:532021-12-29 22:52:117 Things Your Inspector Wishes you Knew
Uncategorized

So You’re Having Your Home Inspected – How to Prepare

One of the steps in the home selling process is having your home inspected by someone the seller has chosen.  The Home inspection is important to both the buyer and the seller, but to the seller it represents another hurdle to getting the contracts signed.   As an inspector I take people on tours of the homes they are planning on buying and talk them through the inspection process, showing them the good, the bad and the really bad.  One of the things that I see on a regular basis is how little many sellers do to prepare for that inspection.  Some sellers just assume that there is nothing they can do to alter the outcome of the inspection, that’s where they are wrong.   Following a few simple steps like those listed below can change the way an inspection occurs and possibly even shorten the number of items on the inspection report.

1. Clean the House

Clutter

This sounds so simple yet homeowners often overlook this tactic. Home inspectors are people first and inspectors second. As people, they carry preconceived ideas of how well a home has been maintained. Clean homes say you care and take care of the house.

2. Be on Time Because the Inspector Will Be

Sometimes home inspectors are early. If an inspector makes an appointment with you for 9:00 a.m., have the house ready for inspection at 9:00 a.m. It’s also common for inspectors to start on the exterior of the home, so leave the shades down or drapes drawn until you are dressed. More than one unprepared seller has been “surprised” by a stranger stomping around in the back yard.

3. Leave the Utilities Connected

The home inspector will need to turn on the stove, run the dishwasher, test the furnace and air conditioning, so leave the utilities on, especially if the house is vacant. It’s impossible to check receptacles for grounding and reverse polarity if the power is turned off. Without utilities, the inspector will have to reschedule, which could delay the closing of your transaction and the removal of the buyer’s home inspection contingency.

4. Provide Workspace Around Furnace and Water Heaters

Remove boxes, bookcases, furniture and anything else blocking access to your furnace, air conditioner and water heater. The inspector will need three to four feet of working space to inspect these items.

5. Keep Pilot Lights Ignited

Many home inspectors will refuse to light pilot lights because they are not covered for that type of liability. If your pilot lights are not lit, then important items such as the water heater, gas stove or furnace will not be inspected, and the buyer could delay closing until those inspections are completed.

6. Provide Access to Attic and Garage

The inspector will need to get into your basement and / or attic as well, so keep a path cleared. Move boxes away from the walls. Vacuum spider webs.

7. Leave Keys for Outbuildings & Electrical Boxes

Leave the remote controls for your garage door opener or a key if the garage is unattached to the house. Unlock the covers for your sprinkler system and electrical box. Leave a key for exterior building access.

8. Clear Away Brush from Exterior Inspection PointsPelhamNYHomeInspection

Nobody expects you to shovel a tunnel around your home if snow drifts are blocking the foundation but, in the winter, do provide a path around the house. In the summer, cut down dead tree branches and clear brush from the foundation. Move trash cans away from the house.

9. Prepare to be Away for Three Hours Minimum

Often the buyer will accompany the home inspector, and buyers feel uncomfortable asking questions if the owner is present. Try to schedule a time for the inspection when you can be out of the house and take the children with you. Crate your pets if you cannot remove them from the premises.


10.  Take Care of Your Pets

Pets Escaping in White Plains NY

Consider removing any dogs in the home and leave a note about any other pets present. Don’t assume that the inspector or buyer will be OK with your dog. Consider taking them with you during the inspection or placing them in a kennel or secured area of the home. If cats or other pets are present, ensure the inspector knows this so they are not let out of the home.

11 Replace Any Burned Out Light bulbs

The inspector won’t know if the bulb is burned out, or if the switch or fixture is bad. A fresh bulb where needed will eliminate this question and help the inspection go smoother.

12. Consider Having a Pre-Listing Inspection

Consider having a pre-listing inspection. If you have further concerns about the condition of the home and the major systems, consider having a pre-listing inspection done. The inspector can point out any repair concerns, providing you with the opportunity to repair items in advance, and further prepare your home for a buyer’s inspection.  Oftentimes items uncovered during an inspection, such as mold, could have been remedied before the inspection eliminating a lot of concern and extra back and forth negotiations.  Sometimes being able to disclose upfront that the boiler or furnace are old, or you know that the roof is in need of repair means not having to re-visit the issues after the inspection.    Sterling Home Inspections can help assist you with Pre-Listing Inspections and perhaps help make the selling process a bit easier.

November 9, 2014/4 Comments/by alansinger
https://www.sterlinghomeinspections.com/wp-content/uploads/sites/57/2018/11/BedfordNYHomeInspectionClutter1.jpg 333 500 alansinger https://d3bfc4j9p6ef23.cloudfront.net/wp-content/uploads/sites/57/2018/11/07195401/logodark.png alansinger2014-11-09 20:25:422021-12-29 22:51:25So You’re Having Your Home Inspected – How to Prepare
Uncategorized

Sterling Home Inspections New Promotional Video

July 11, 2014/0 Comments/by alansinger
https://www.sterlinghomeinspections.com/wp-content/uploads/sites/57/2018/11/STERLING-162013-HG.png 296 666 alansinger https://d3bfc4j9p6ef23.cloudfront.net/wp-content/uploads/sites/57/2018/11/07195401/logodark.png alansinger2014-07-11 21:25:132018-11-09 18:33:42Sterling Home Inspections New Promotional Video
Uncategorized

Ice Dams – Can They Be Prevented?


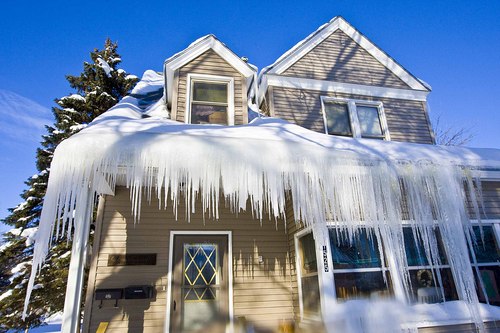
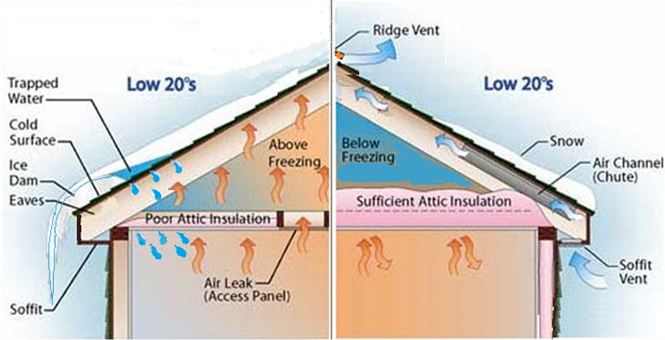
During snowy winters, many northern homes are plagued by ice dams. If your house suffers from wet ceilings during the winter, you may be ready to call up a contractor. Be careful, though: since most contractors don’t understand the causes of ice dams, they often suggest the wrong solution. Ice dams form when a home’s escaping heat warms the roof sheathing and melts the underside of the snow layer on the roof. Water trickles down the roof until it reaches the cold roofing over the eaves, where it freezes. After a while, the ice at the eaves gets thicker and thicker, forming an ice dam. Eventually, water backs up behind the ice dam. If the water reservoir is large enough, it can back up under the roof shingles and damage ceilings.
The four possible solutions to ice damming are:

  1. Sealing air leaks between the warm interior and the attic or cathedral ceiling.
  2. Adding more ceiling insulation.
  3. Improving ventilation between the top of the insulation and the roof sheathing.
  4. Installing a rubberized membrane under the roofing.

While the first two of these solutions can reduce or eliminate the problem, the last two solutions are the equivalent of waving a white flag and admitting defeat.

Step one: seal the air leaks

Most ice dams are caused by flaws in a home’s air barrier. If escaping indoor air finds its way to the underside of the roof sheathing during the winter, the heated air raises the temperature of the sheathing. That’s bad.

Step two: check your insulation level

Once you’ve plugged your air leaks, check your insulation levels. The latest version of the
International Residential Code requires R-49 ceiling insulation in New York.
In these areas, ceilings need a minimum of 14 inches of fiberglass batts, cellulose, or open-cell spray foam. If you’re using blown-in fiberglass, you’ll need about 20 inches to achieve R-49.
Two more points about attic insulation:
Attic insulation must completely cover the top plates of a home’s exterior walls.
Code insulation requirements represent the legal minimum. Most green builders choose to exceed these minimum requirements.

Step three: improve ventilation between the insulation and the roof sheathing

Once you’ve done your best with steps 1 and 2, it’s worth considering step 3: ventilation.
In the world of ice-dam prevention, ventilation is capitulation. By recommending ventilation, a
builder is saying, “I wasn’t able to include enough insulation to prevent the roof sheathing from being warmed by escaping building heat. So, I guess I’ll use another method to cool the roof — I’ll ventilate the underside of the roof with exterior air.” Although it is an admission of failure, this type of roof ventilation often makes sense. It’s a kind of insurance.
When using roof ventilation to address ice dams, remember: Ventilation should always be the third, not the first, weapon in your arsenal. Distrust any expert who advises using ventilation as the first step toward solving an ice dam problem. If ventilation channels are improved without any attempt to perform air sealing work, ventilation improvements can make an ice dam problem worse or increase a home’s fuel bills. (By depressurizing an attic, an effective ridge vent often increases air leakage through the ceiling, bringing more heat than ever against the roof sheathing.) The best ventilation channels include a balance of soffit vents and ridge vents. Attics do not need gable vents. In a cathedral ceiling, provide an air barrier between the top of the insulation and the ventilation channel. Site-built ventilation chutes (foamed or caulked in place) are far preferable to polystyrene Proper-Vents.

Step four: cover your roof sheathing with rubberized membrane underlayment

There are lots of roofers out there with a sure-fire cure for ice dam problems: just cover your entire
roof with Ice & Water Shield. Run, don’t walk, away from such a roofer. These are the guys who have completely thrown in the towel. They have no plan to seal air leaks into your attic. They have no plan to improve your insulation level. They’ve given up on ventilation. In fact, they have no plan whatsoever to prevent ice dams. This is what they’re saying: “Yup, your roof is going to get an ice dam. Maybe a big one. We can’t plug your energy leak, so we’ll just let the ice dam develop. The Ice & Water Shield will probably keep your ceiling dry.” That said, Ice & Water Shield is relatively cheap insurance. Used properly — extending from your eaves to a point that is 3 feet higher than the plane of your exterior wall — Ice & Water Shield will Prevent Ice Dams with Air Sealing and Insulation to limit damage from ice dams that form due to unusual weather conditions or some idiot who disturbed your attic insulation. But remember ventilation and rubberized membranes should be the last weapons in your arsenal.


February 19, 2014/0 Comments/by alansinger
https://www.sterlinghomeinspections.com/wp-content/uploads/sites/57/2018/11/HousewithIceDaminScarsdaleNY.jpg 333 500 alansinger https://d3bfc4j9p6ef23.cloudfront.net/wp-content/uploads/sites/57/2018/11/07195401/logodark.png alansinger2014-02-19 13:52:072021-12-29 22:48:29Ice Dams – Can They Be Prevented?
Uncategorized

Well Water Testing In Westchester NY

Sterling Home Inspections is now available to perform well water testing for home sellers in northern Westchester in compliance with Local Law 7.

As of November 19, 2007, anyone that sells their home in Westchester County, New York, that has a private water well, must have it tested when they sign the contract of sale. The county introduced this law to monitor the water quality in the area regarding private wells. It requires the seller to have their well tested by a certified water operator and laboratory for a number of substances including bacteria, chemicals, metals and other contaminants. The tests must be paid for by the seller and be ordered within 10 days of the signing of the contract. The law also states that the buyer and seller cannot waive the testing because a copy of the test results must be sent by the laboratory to the Westchester County Department of Health, and to the seller. This new law also affects tenants who rent a property that is supplied with well water.

The burden of compliance falls into the hands of the homeowner; within ten days of a signed contract of sale, the seller must conduct a water test (or provide confirmation that one has been ordered) which will identify any primary contaminants. The seller is required to pay for the cost of testing. Within 5 days of the receipt of the water test results from a certified lab, the seller is required to deliver these results to the buyer. Additionally, The County Health Department must receive a copy of the test results directly from the certified lab. Also, all new wells must be tested prior to first use. And any well not in use for a period of five years must also be tested. Homeowners and landlords must have samples taken by a laboratory technician who is certified by the Westchester County Health Department; sellers, buyers, Realtors, or any third party cannot submit water samples. Charges for water testing is between $425.00 and $500.00 and the seller is required to pay.

As for the low maintenance of having a private well, there are a few things you should know about:

Well maintenance is low but could be costly when you neglect what needs to be done in the first place. Maintaining wells is for your health and the value of your home.

water+testing+image

Most well waters are safe; Mother Nature has its own filtering system. But do your due diligence and have it tested yearly. Annual water testing is recommended for having safe water, testing for contamination is insurance for you and your family. The EPA does not have any jurisdiction over private wells that serve less than 25 people; it is up to the owner and the owner alone to make sure the water is safe.  Per the EPA website:
“Well water should be tested every spring to make sure there are no mechanical problems; test it once each year for germs and once every two or three years for harmful chemicals. You should also have your well water tested after repairs, after serious storms or flooding, any time there is a change in the water. Laboratories will test well water for the same impurities and health standards as public water supply.”

Try not use any chemicals, including lawn products and pesticides near your well.

Walk around you’re the area of your well several times a year, make sure the cap is on tight, and do a quick inspection.

You probably know well water is typically hard, meaning it has many minerals in it. There are several ways to remove the hardness, such as the use of a salt pellet system, also there are systems that use potassium which doesn’t appear to be as bad for the environment, plants, and water treatment facilities. Also, there is an ion exchange softener that removes hardness (calcium and magnesium), by running water through resin beads that are saturated with sodium chloride or potassium chloride salts.

February 17, 2014/0 Comments/by alansinger
https://www.sterlinghomeinspections.com/wp-content/uploads/sites/57/2014/02/water testing image.jpg 830 1000 alansinger https://d3bfc4j9p6ef23.cloudfront.net/wp-content/uploads/sites/57/2018/11/07195401/logodark.png alansinger2014-02-17 12:42:202021-12-29 22:47:47Well Water Testing In Westchester NY
Uncategorized

Don’t Over Do It With The Humidifier

As we enter the cold and snow filled season of winter here in New York I would like to take a brief moment and help educate you on the importance of monitoring and adjusting your humidity levels inside the home.

I was recently in a home in South Salem where I noticed the drywall seams and tape joints were all peeling away and were curled.  Upon further examination, I found suspected black mold colonies beginning to form on the pitched ceiling.  After flowing through the rest of the home I began to notice condensation on the insides of all of the windows (it was only 45 degrees outside?).  This had apparently been going on for some time because the windows all had black mildew / mold growth present on the interior window frames.

Water Droplets

Water Droplets — Image by © Royalty-Free/Corbis

The homeowner stated that they run a humidifier in the home every night because their doctor said it was necessary.  A quick measurement in the kid’s bedroom indicated a humidity level of over 58%, and the humidifier had not been running for a good three hours prior to my arrival.  In addition, there was an Aprilaire humidifier installed on the furnace unit which was running and set at maximum.  A large 55-gallon aquarium also was present in the family room.  The one and only bathroom had no exhaust fan and no window, thus no ventilation.  All in all, the home was a virtual steam room.

I may ruffle the feathers of a few medical professionals here, but the constant recommendations of running humidifiers and vaporizers have gotten out of hand.  If your child has a bout with the flu bug or common cold, then by all means run a humidifier in their room while they are sleeping.  Turn the unit off when they wake up, and back on at bedtime.  When the cold and flu symptoms are gone, quit using the vaporizer!!

Furthermore, whole house humidifiers installed on furnace units should never be set above 25-35% humidity.  Any more than that, and you are potentially growing mold and risking poor indoor air quality.  And in the case of the South Salem home, damaging the structure and likely making everyone even sicker due to the mold exposure.


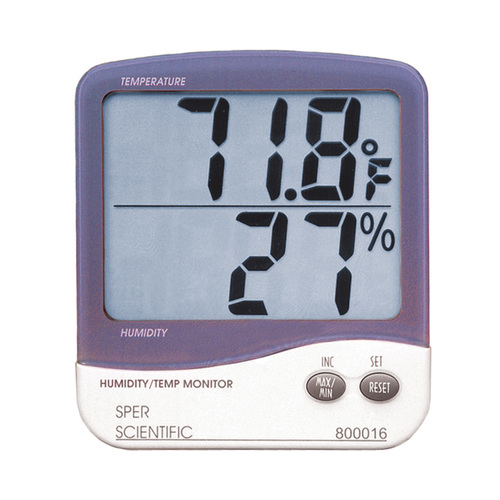
An easy and inexpensive solution is to purchase a hygrometer (an
instrument used to measure humidity) and place one on each level of the
home.  These are available at online retailers such as Amazon or at
specialty stores such as Brookstone or Sharper Image.  This way you can
accurately monitor your humidity levels and make adjustments as
necessary.  A rough guideline for ideal humidity level is 25-35% REL.

For inaccurate adjustmentshumidity-temp-monitor… (not my recommendation mind you) if you
have condensation forming on windows, walls, ceilings then yes you
have too much humidity.  On the opposite spectrum, if you are plagued
with static electricity, bloody noses, or extremely dry skin or hair
then you likely need to increase your humidity levels.

January 9, 2014/1 Comment/by alansinger
https://www.sterlinghomeinspections.com/wp-content/uploads/sites/57/2018/11/HumidityinRyeNYHomeInspection.jpg 505 500 alansinger https://d3bfc4j9p6ef23.cloudfront.net/wp-content/uploads/sites/57/2018/11/07195401/logodark.png alansinger2014-01-09 03:10:462021-12-29 22:46:16Don’t Over Do It With The Humidifier
Uncategorized

Carbon Monoxide Detector Placement – Do’s and Don’ts

Now that winter is here, the widows are closed for the duration and the furnace is set on high its time to make sure our carbon monoxide detectors are working and placed correctly to save us in the event of an emergency.

Every fuel-burning appliance in your home, including a gas furnace, produces some levels of carbon monoxide. Normally those gasses are carried out of your home, but if something goes wrong a CO leak can be life-threatening to your family. That’s why it’s so important to have carbon monoxide detectors to help warn you of excess CO in your air.

So where should carbon monoxide detectors be placed in order to best detect CO leaks in your home?

Carbon monoxide detectors placement: Do’s

In order to maximize the protection of your home from excess levels of carbon monoxide, place your detectors in all of the following places:

  • On every level of your home. In order to ensure that your home has maximum protection, it’s important to have a CO detector on every floor.
  • Five feet from the ground. Carbon monoxide detectors can get the best reading of your home’s air when they are placed five feet from the ground.
  • Near every sleeping area. If your CO levels get too high during the nighttime, it’s important that detectors can be heard by everyone sleeping in your home. Place your detectors close enough to every sleeping area so that they can awaken everyone in the case of an emergency.
  • Near attached garages. Cars produce carbon monoxide any time they are running. If you have an attached garage, those gasses can quickly spread to the rest of your house. A CO detector near your attached garage will warn you if that becomes a problem.
  • Where the manufacturer recommends. Every model of carbon monoxide detector is tested according to manufacturer specifications. It’s important to take those specifications into account when you’re deciding where to place your detectors.

Carbon monoxide detectors placement: Don’ts

The following locations can either create a false alarm or avoid your detector from properly identifying the CO levels in your home:

  • In close proximity to any fuel-burning appliance.
  • In excessively humid areas such as your bathroom.
  • In direct sunlight.
  • Near any sources of blowing air such as a fan, vent or open window.

How Carbon Monoxide Is Measured

Before we get into what to look for when purchasing carbon monoxide detectors, it will help if you understand how carbon monoxide is measured.

CO is measured in a ratio called ppm (parts per million). Just as 5% means 5 out of a 100, 5 ppm means 5 out of 1 million. So, if your home has 10 ppm of carbon monoxide, there is 10 carbon monoxide molecules for every million molecules in the air.

How Much CO is Too Much?

Even in homes without gas appliances, there could be CO. So how do you know how much is too much? It depends on your age, size and health. Here are some common thresholds of carbon monoxide.

  • 0.5-5 ppm – According to the Environmental Protection Agency (EPA), this is the usual range for homes without gas stoves or other gas appliances.
  • Under 70 ppm – Most people have no ill effects when exposed to ranges below 70 ppm for short periods of time. Prolonged exposure (6-8) hours can cause dizziness and headaches. Also, those with heart problems may experience chest pain, according to the Consumer Product Safety Commission (CPSC).
  • 100 ppm – Slight headache when exposed for 2 hours or longer.
  • 150-200 ppm – Prolonged exposure at these levels often leads to disorientation and unconsciousness and can also lead to death.

Types of Carbon Monoxide Detectors

Now that you understand how carbon monoxide is measured, you’re better prepared to understand the two basic types of carbon monoxide detection devices: alarms and monitors.

Carbon monoxide alarms or detectors
These are the most common type of carbon monoxide devices. They work like your smoke or fire alarms, simply alerting you when it deems that there is a dangerous amount of carbon monoxide in your home.

However, long exposure to low levels of CO can be as dangerous as short amount of exposure to high levels. And most alarms and detectors only tell you about the high levels. That’s where the carbon monoxide monitor enters.

Carbon monoxide monitor
A carbon monoxide monitor is different because it actively monitors the amount of carbon monoxide in your air and gives you a digital readout. This lets you know when there are higher than usual amounts of CO in your home, even if they aren’t at what other alarms deem a “dangerous” level.

Which is Better?

I encourage homeowners to purchase a carbon monoxide monitor, especially if you live with young children or elderly parents, as they can be more susceptible to carbon monoxide poisoning. However, carbon monoxide monitors with digital displays can be more expensive and having an alarm or detector is better than no device at all.

December 11, 2013/32 Comments/by alansinger
https://www.sterlinghomeinspections.com/wp-content/uploads/sites/57/2018/11/Smoke Detector and Alarm.jpg 605 640 alansinger https://d3bfc4j9p6ef23.cloudfront.net/wp-content/uploads/sites/57/2018/11/07195401/logodark.png alansinger2013-12-11 00:50:592023-12-29 18:20:43Carbon Monoxide Detector Placement – Do’s and Don’ts
Uncategorized

Do Programable Thermostats Really Save Money?

Programmable thermostats save you money. That’s a no-brainer, right? You’ve seen that advice in books and magazines and on personal-finance blogs — even heard it from me

Well, it turns out programmable thermostats aren’t the miracle device we’ve believed all along. In fact, sometimes using a programmable thermostat costs more than not having one at all. But the fault doesn’t lie with the thermostat. The trouble, as my father used to say, is the nut behind the wheel.

Theory and practice
In theory, programmable thermostats are a great way to save on home energy costs.

According to the Energy Information Administration, about 42% of home energy costs go to heating and cooling. A lot of these costs come from heating and cooling empty (or unused) spaces, including heating and cooling while people are asleep. In plain English: People spend a lot to heat and cool their homes, and they’re not good about turning things off when they’re not needed.

In fact, some folks think it uses more energy (and thus costs more) to turn the thermostat down at night and then re-heat the following day. They’re wrong. A 1978 research paper (“Energy Savings through Thermostat Setbacks” by Nelson and MacArthur) confirmed basic physics. On average, if you turn the thermostat down by one degree Fahrenheit for eight hours every night, you’ll use about 1% less energy. (So, if you turn the temperature down by 10 degrees every night, you’ll use about 10% less energy.) But note that you’ll see less savings in milder climates (the bigger the difference between indoor and outdoor temperatures, the more you save by adjusting the thermostat) and with electric heat.

Based on this, it makes sense that a programmable thermostat could reduce energy usage. You simply program the thermostat to warm (or cool) your home when you’re actually there; when you’re away (or asleep), the thermostat switches off. As is often the case, though, practice is different than theory.

The main problem is that people don’t use programmable thermostats the way they’re intended. Someone might keep the home cool during the day, for instance, but crank the heat above room temperature at night. But even when used properly, programmable thermostats may not offer a cost savings.

Where’s the savings?
An Environmental Protection Agency (EPA) document from 2004 describing the Energy Star programmable thermostats specification [PDF] summarizes the research into their efficacy:

Consumers are often advised that installing a programmable thermostat can save them anywhere from 10 to 30% on the space heating and cooling portion of their energy bills. While reliant on proper use of the programmable thermostat, such savings are easily true in theory; however, there needs to be more field-tested data to better substantiate savings claims. Analyses from recent field studies have suggested that programmable thermostats may be achieving considerably lower savings than their estimated potential.

How much lower? In 2007, RLW Analytics prepared a report for Gas Networks, a New England-based energy company. “Validating the Impact of Programmable Thermostats” [PDF] found that using an Energy Star-certified programmable thermostat produced an average savings of about “6.2% of total household annual natural gas consumption”. Those who installed programmable thermostats into older heating systems (in other words, those who didn’t install a new heating system at the same time) saved an average of 6.8%.

And that study painted the rosiest picture of programmable thermostats.

Note: The New England study also found that people who micromanage their manual thermostats use more energy than those who just leave them at predefined points for longer periods of time.

In 2000, the Energy Center of Wisconsin published a report entitled “Programmable Thermostats Gone Berserk? Taking a Social Perspective on Space Heating in Wisconsin” [PDF]. The study found, in part, that:

Despite the emphasis that has been placed on the use of programmable thermostats to reduce thermostat setpoints and so save heating energy, respondents with programmable thermostats report thermostat setpoints that are not substantially different from those of respondents with manual thermostats.

These details and the conclusions above lead us to suspect that the aggregate savings that can be expected from the installation of programmable thermostats in residential housing is probably quite modest.

Elsewhere, it’s worse. Sometimes those with programmable thermostats use more energy. In 2008-2009, Florida Power & Light conducted a study of 400 homes with programmable thermostats [PDF]. Turns out that those who programmed their thermostats actually used 12% more cooling energy than those who did not.

Sure, those who programmed the thermostat used less energy when they weren’t around; however, they tended to set the thermostat much lower for the times they were home. As a result, the folks who did nothing saved more energy.

Why is there a discrepancy between the theoretical and actual savings with programmable thermostats? Because the proposed savings were, in actuality, theoretical. That is, they were based on computer models and not on real-world experience. Now that there’s enough real-world data, it’s clear that programmable thermostats have only a minimal impact on energy consumption. As in other areas of personal finance, it’s human behavior that make the most difference.

The bottom line
In May 2009, the EPA suspended Energy Star certification for programmable thermostats [PDF], writing:

EPA has been unable to confirm any improvement in terms of the savings delivered by programmable thermostats and has no credible basis for continuing to extend the current Energy Star specification.

Programmable thermostats can reduce energy consumption — if they’re used right. But so can regular thermostats. What does make a difference on your heating and cooling costs? According to the Wisconsin study I mentioned earlier, your attitude toward conservation makes a big difference in energy consumption.

  • If you’re motivated to save energy (for whatever reason), you’re more likely to use less energy. In this case, a programmable thermostat makes no difference.
  • If you don’t care about saving energy, you’re likely to use more energy. Again, a programmable thermostat won’t change this.

Programmable thermostats can save money — not just in theory — but only if they’re used correctly. Pick your set points based on your household’s habits, and then leave them there. Don’t fuss with the thermostat. The following is a typical energy-efficient program:

  • During the winter, set your thermostat for 68°F (20°C) while you’re awake, and set it lower for when you’re away or asleep.
  • During the summer, set your thermostat for 78°F (26°C) while your home, and turn it off when you’re away.
  • Better yet, heat (and cool) individual rooms instead of the entire house. If you tend to spend a lot of time in just one or two rooms, you can save a lot of money by using a space heater or a room-sized air conditioner.

Our thermostat is programmed for 65 when we’re home and 58 when we’re away or asleep. It kicks on about an hour before we wake or arrive home.

After all these words, the bottom line is common sense: Whether you use a programmable thermostat or not, if you turn down the heat (or turn off the air conditioning) when you don’t need it, you’ll save money.

Remember: Nobody cares more about your money than you do. Don’t just take someone else’s word about financial matters — not even mine. Conduct your own tests and experiments. Read. Draw your own conclusions. Do what works for you. You can also check out this super article for other ways to save money at home:
https://homeviable.com/how-to-save-money-each-month/

November 18, 2013/1 Comment/by alansinger
https://www.sterlinghomeinspections.com/wp-content/uploads/sites/57/2018/11/STERLING-162013-HG.png 296 666 alansinger https://d3bfc4j9p6ef23.cloudfront.net/wp-content/uploads/sites/57/2018/11/07195401/logodark.png alansinger2013-11-18 16:00:212021-12-29 22:43:39Do Programable Thermostats Really Save Money?
Uncategorized

Why is My Water Heater Leaking?

Have you taken a look at your water heater recently? They typically sit in our basements, and we really don’t think about them for years until one day you find them leaking, or worse, spilling gallons of water on the floor. There are a few maintenance tips I give home buyers during an inspection that I’d like to share and also some general inspection tips you can do every so often to try to avoid having gallons of water spilled on your floor.

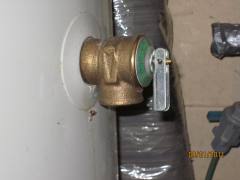
First off, the maintenance tips. I always like to show homebuyers the Temperature Pressure Relief (TPR) valve. This is one of the major safety features on a water heater. You’ll usually find it on the side of the tank, sometimes on top. It should have a pipe attached to it that runs down the side of the tank and stops short of the ground (it should terminate within 6” of the ground). The TPR valve is
meant to release before the temperature gets too high or pressure builds up too much to the point where the tank would explode (do a Google search for some cool video).

Water+Heater+Discharge+Valve

It should be tested once or twice a year. It’s pretty easy – just put a bucket at the base of the discharge pipe, lift up the lever on the TPR valve, let some water run out and release the lever back down. If you don’t get any water or it continues to drip after it’s drained, it’s time to have the TPR valve replaced.

While you’re testing the TPR valve, take a look at the discharge pipe. First off, there should be one. If there isn’t one (see pic), it’s a safety hazard if that valve were to release. Next, there should not be a cap on the end of it (that would defeat the purpose). And the end of the pipe shouldn’t be threaded (to keep people from capping it). It should terminate within 6” from the ground.

From a maintenance standpoint, the other thing you can do is drain some water out of the bottom of the tank once a year or so to flush and sediment out of the base of the tank. If you’ve got an older water heater and you’ve never done it, it might not be worth trying to start doing it now. But if your water heater is only a few years old, it’s a yearly task that should get you more life out of the water heater.

To do this, connect a short hose to the drain valve at the base of the water heater and run it to the main floor drain, laundry sink, bathtub or even outside. Shut-off the cold-water supply to the water heater (there should be a shutoff valve on the cold water piping just above the tank) and/or the electricity running to the water heater. Open a hot water faucet (maybe at the laundry sink if that’s nearby). And open the drain valve. Watch the water coming out, you might find that you have to turn the cold-water supply on and off to help flush the sediment out of the base of the tank. There’s a great video on how to do this here:

http://www.thisoldhouse.com/toh/video/0,,20047191,00.html

That’s if from a maintenance standpoint. It’s also good to visually inspect your water heater a couple of times a year. First take a look at that discharge pipe connected to the TPR valve. Is there water dripping from it? If so, the TPR valve likely needs replacement. Next take a look at the top of the tank. Are combustible materials (like pipe insulation) cleared at least 12” from the top of the tank? Take a look at the cold (and maybe hot) water supply shut-off valves. Do they look corroded? Might be time to have a plumber out to replace them.

If you’ve got a gas water heater, take a look around the draft hood area at the top of the tank. Take note if there are a lot of rust flakes in this area. It could be an indication the water heater is having problems drafting or not combusting properly. Take a look at the flue pipes. Are they connected with at least three metal screws at each connection? Does it pitch upwards at least a ¼” per foot? If there are too many bends in the flue pipe that might be why it’s not drafting properly. Might be time to call in an expert for further evaluation.

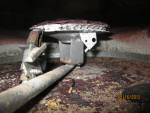
Rust in water heater burner chamber

You can also take a look inside the burner chamber of gas-fired water heaters. Rust flakes and corrosion are an indication the water heater’s getting old. If there are a lot of rust flakes, it might be time to consider replacement. Look at the base of the tank while you’re down here. See any water? If so, the tank is probably ready to dump. Make sure you keep combustibles away from this area and it’s not blocked so the water heater can get the proper amount of air it needs to combust properly.

Let the hot water run at a faucet and listen to the water heater as it’s heating up water. Is the tank making noise? I’ve had some water
heaters that sound like they’re making popcorn inside the tank. The sound is the sediment in the bottom of the tank bouncing around as it’s heated up.

So, take some time to take a look at your water heater. Keep in mind
that the typical service life for water heaters is 10-12 years. That’s just the average. I’ve had people tell me their water heater dumped out at eight years. But with a little maintenance, you can get plenty of life out of them.

November 7, 2013/4 Comments/by alansinger
https://www.sterlinghomeinspections.com/wp-content/uploads/sites/57/2013/11/Water Heater Discharge Valve.jpg 180 240 alansinger https://d3bfc4j9p6ef23.cloudfront.net/wp-content/uploads/sites/57/2018/11/07195401/logodark.png alansinger2013-11-07 00:23:422021-12-29 22:14:06Why is My Water Heater Leaking?
Uncategorized

How Long Do You Think MY Roof Will Last?

One of the most common things a buyer wants to know about the house is, “How old is the roof.” This is code for, “How much longer will the roof last.”

These questions are not all that easy to answer—especially the later one.

While I do my best to give some “general” guidance regarding these questions, I make it very clear that whatever I say should be considered a “guesstimate” at best. There are many factors that can contribute to the condition of a roof: color, type, style, installation methods, exposure, maintenance, factory defects etc.

SterlingHomeInspectionsRoofInspectioninNewRochelleNY

For example, take your typical “15-20 year,” three-tab, composition roof. Exposed to full sun, a light-colored roof will tend to last longer than a dark black roof. Protected from full sun all colors will last longer but if this protection results in the roof staying covered with moss the roof can be damaged anyway. Frequent pressure washing will take years off the life of a roof, as will installing it over other layers of shingles. Shingles that are stapled as opposed to nailed are more vulnerable to wind damage.

Roofs can be subject to other forms of mechanical damage such as from overhanging trees, shoveling off snow in the winter, hail, water from upper roofs beating down on lower roofs, and downspouts from upper gutters flooding across lower roof surfaces. Even pigeons and seagulls, hanging out on the ridge pecking at the roofing granules, can damage a roof. Installing shingles when it is too hot can cause mechanical damage that will later result in a shortening of the life of the covering.

Of course, using the roof for sunbathing and star gazing can cause damage to the roof—-as well as uncontrolled falls to the bather/gazer.

These indicators also have to be adjusted for different conditions in different parts of the country.

So, when a buyer asks me how long the roof is going to last, these are the kinds of things I must consider in giving any kind of an answer.

A roof that has few visible signs of aging is the hardest to predict
in some ways. We often have sources of information to give us clues as to when the roof was installed and then we can use rough rules of thumbs to give an “approximate” idea of how much longer the roof might last. For example, if the seller tells us that the roof was replaced when he bought it and we know he bought it ten years ago it is a “fairly” safe bet it is 10 years old. That info, coupled with what it “actually” looks like at the time of inspection, one could reasonably expect to get another 5 years out of the roof—-assuming that it is a
15-year-roof—-and it looked like it might last another 5 years. Again, I always warn my buyers that these are “best guesses” and that there are many factors to take into account.

No home inspector is likely to “warrant” a roof and most are pretty careful to make their predictions “necessarily” vague. The reality is, that predicting the life of a roof is very difficult and if one is accurate within 5 years one is probably pretty close.

Old Roof During Larchmont Home Inspection Old Roof During Larchmont Home Inspection

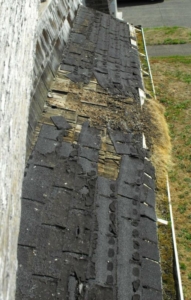
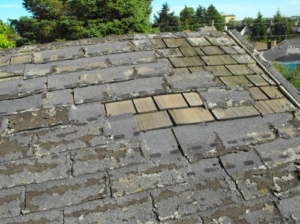
On the other hand, some roofs speak very clearly when they are past their expected life, as the following picture will attest.

There are no maintenance questions here.

There are no questions as to how much longer the roof will last.

This roof was “toast” many years ago

This roof was likely past its expected life 20 years ago—and the buckets in the attic agreed with me.

November 4, 2013/2 Comments/by alansinger
https://www.sterlinghomeinspections.com/wp-content/uploads/sites/57/2018/11/RoofPastItsPrime.jpg 374 500 alansinger https://d3bfc4j9p6ef23.cloudfront.net/wp-content/uploads/sites/57/2018/11/07195401/logodark.png alansinger2013-11-04 13:18:162021-12-29 22:12:20How Long Do You Think MY Roof Will Last?
Uncategorized

The Real Truth About Mold And Bleach

One of the questions I hear most in regard to cleaning up mold in the household is: “Should I just use some bleach on it?”.

Here’s an emphatic answer for you: No!

Household bleach is generally a solution containing 4-6% sodium hypochlorite and 0.01-0.05% sodium hydroxide. It is most frequently used as a disinfectant or a bleaching agent in our clothing. US Government regulations allow food processing equipment and surfaces to be sanitized with solutions containing bleach, provided that the solution is allowed to drain adequately before contact with food, and that the solutions do not exceed 200 ppm. If higher concentrations are used, the surface must be rinsed with potable water after sanitizing. A 1 in 5 dilution of household bleach with water (1 part bleach to 4 parts water) is also effective against many bacteria and some viruses and is often the disinfectant of choice in cleaning surfaces in hospitals.

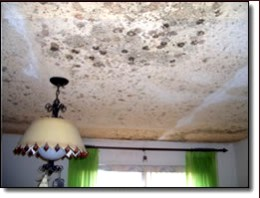
Ceiling Covered With Mold Ceiling Covered With Mold

However, as a fungicide (or “mold killer”) on porous surfaces such as walls, floors, ceilings, and cabinets, it is not effective – in fact, it can actually provide nutrients to the mold and make problems worse. The Clorox ® Company, OSHA, and the US EPA all have determined that bleach should not be used in mold remediation.

While bleach appears to kill mold, just the surface mold is affected – the hidden mold underneath the surface remains alive and well.

Bleach can also be extremely dangerous, and in the shadow of the ‘green’ movement, is not environmentally friendly. Mixing bleach with other cleaning solutions or detergents that contain ammonia can produce highly toxic fumes including cyanide gas. A small percentage of the sodium hypochlorite will also break down into chloroform and carbon tetrachloride. It was estimated in
1992 using market data, that stored household products would have contributed to 12 tons of chloroform and 28 tons of carbon
tetrachloride. Chloroform breaks down in the troposphere and it was estimated that about 96,000 tons of carbon tetrachloride are released annually.

So what do you use? The object of mold removal is to clean the surface and remove loose moldy material, not to try to sterilize the surface. Certain mold-contaminated materials that cannot be suitably cleaned (drywall, carpeting, and curtains) should simply be discarded. Clothing and bedding linens or towels can be washed or
dry-cleaned. For hard, non-porous surfaces, any cleaning method that removes surface mold is fine: warm water and soap are your best choice. Stains that are left behind, such as on framing lumber, are generally harmless, provided that you keep the areas properly dry. If you don’t keep the area dry, new mold growth will readily occur on many surfaces regardless of the old stains that were left from the prior mold cleanup.

Remember to always hire a professional when you are unsure, are dealing with a large area, or if anyone in the home is experiencing symptoms. Simply killing mold is not always the answer. Dead airborne mold material can be as equally bothersome as living mold!

October 16, 2013/0 Comments/by alansinger
https://www.sterlinghomeinspections.com/wp-content/uploads/sites/57/2018/11/moldyceiling.jpg.png 198 260 alansinger https://d3bfc4j9p6ef23.cloudfront.net/wp-content/uploads/sites/57/2018/11/07195401/logodark.png alansinger2013-10-16 02:56:402021-12-29 22:09:24The Real Truth About Mold And Bleach
Uncategorized

Holmes Inspections: Don’t Believe Everything You See On TV

There’s a show on HGTV called Holmes Inspection, which exposes problems with houses that were allegedly missed by other home inspectors. Here’s the basic formula: Frank and Fran buy a house, have it inspected, no major problems. Time passes, problems show up, Mike Holmes gets called in. Mike inspects the house, agrees there’s a problem, tears everything open to show what was done wrong or could have been done better, and then says he’ll “make it right”. In the end, the original home inspector gets blamed for missing defects with the house.

I’ve had countless clients ask me about the show, and I’ve heard a lot of discussion about the show from other home inspectors, so I finally took the time to watch an episode to see what all the talk was about.

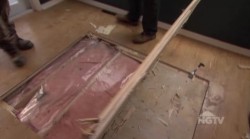
Holmes Inspection makes for great TV. I watched an episode titled Frigid Floor, wherein the homeowners complained about a cold floor at the addition of their house. There were a couple of other miscellaneous issues, but the big one was the cold floor. Mike Holmes doesn’t know exactly what the problem is, so he has his crew come in and cut out a huge section of the kitchen floor to get at the crawl space below. There is no final diagnosis of what the problem is, but his crew spares no expense in making it right.

Floor Being Opened Up

They tear out all of the cabinets, countertops, flooring, and subfloor to get at the crawl space. They spend three days hand digging the crawl space to make it several feet deeper, install rigid foam on the floor, pour self-leveling concrete on the floor, then have the walls insulated with spray foam (I loved that part). While they’re at it, they also beef up the floor structure. They add access to the crawl space from inside the basement by cutting an opening through the foundation wall, and they add a heat register and a light. They definitely ‘make it right’.

The original contractor who did the addition gets thrown under the bus; Mike says that this is how the job should have been done to start with. While Mike’s work was far superior to that of the original contractor, I think it’s unfair to put down the original contractor. The work was done for the previous owner, permits were pulled, and the work was inspected and approved. We have no idea of what was agreed upon between the original contractor and the previous owners. Maybe the original contractor gave the previous owners a bid to do exactly what Mike Holmes did, and the owners opted to save $10k by only doing the bare minimum.

If the previous owners got three different bids for the job, there’s a slim chance that the contractor who gave them a bid on a beautiful crawl space would actually get the job.

The original home inspector gets thrown under the bus as well. Mike concludes the show by saying that if the original home inspector actually knew something about construction, he would have warned the buyers that there was no crawl space. That comment really bugged me. The home did have a crawl space, it just
didn’t have any access, and it was too small for most people to actually crawl in to; that doesn’t mean it’s not a crawl space. I’d love to
know what Mike would have said to the buyers if he had done the original home inspection. Here are a few potential warnings:

  • This home has no accessible crawl space. So what?
  • This home has no accessible crawl space, but it should. I can’t inspect what I can’t see. Before you buy this house, you should have the sellers make the crawl space accessible and have it inspected. The home inspection was performed in warm weather, and there were no signs of any problems. The work was done with permits and inspected, so what would actually happen if the buyers demanded the crawl space be made accessible for the inspection? Do you think the sellers would agree to that? My experience tells me absolutely not.
  • This home has no accessible crawl space. I know that permits were pulled for the addition and inspected by the city, but I don’t care. If I can’t see it, it’s probably not right. Don’t buy this house. Ha! Now I’m just being silly… I think.

Just for the sake of argument, let’s say the inspection was done during the winter, the floor was cold, and the crawl space was barely accessible. What would the recommendation have been? Gut the kitchen and make it right? That suggestion would go over like a lead balloon.
Personally, I would have told the buyers that the floor was cold, and to fix it would probably be cost prohibitive. This is what you’re getting, take it or leave it.

My conclusion

I’m not trying to be too critical of the show, but the repairs performed on this house were completely over-the-top and unrealistic.
Don’t get me wrong, it’s a very cool concept for a show – take a problem with a house that is cost prohibitive to repair and fix it any way you want with time and money being no object. It would have been nice to do it this way from the start, sure… but I can’t imagine any sane person spending their own money gutting a kitchen just to make the floor warmer. This is a fun show to watch as long as you remember that it’s just TV. I think the main messages are good: hire an excellent home inspector and don’t skimp out on your remodel project. You’ll save money in the long run by spending a little more up front.

September 14, 2013/3 Comments/by alansinger
https://www.sterlinghomeinspections.com/wp-content/uploads/sites/57/2018/11/CuttingOpenTheKitchenFloor.jpg 139 250 alansinger https://d3bfc4j9p6ef23.cloudfront.net/wp-content/uploads/sites/57/2018/11/07195401/logodark.png alansinger2013-09-14 12:26:362021-12-29 22:08:10Holmes Inspections: Don’t Believe Everything You See On TV
Uncategorized

“There’s absolutely nothing wrong with it!”

We often call out issues or defects during a home inspection that lead us to recommend evaluation and repair by licensed contractors. But sometimes that contractor shows up and tells the owner or buyer, “There’s absolutely nothing wrong with this. The home inspector was paranoid.”

Who’s right?

The short answer is, both of us might be wrong, and both of us might be right


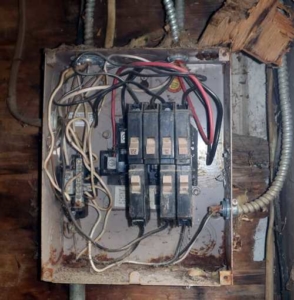
Corroded Electrical Panel

Let’s take an example: a corroded electrical panel, like the one to the right. To a home inspector, corrosion means water, and water and electricity don’t play well together. We will call for repair or replacement of the panel. When the electrician shows up, they could very well look at the panel and say, “Yes, there’s corrosion, but it’s not that bad and I don’t think it needs to be replaced.”

Now what?

The best thing to do in this situation is to ask the contractor to declare in writing that the particular system does not have a defect and is safe to operate as is. This declaration should be on the company letterhead, complete with license number and full company information. If this is provided, then the responsibility and liability for the system is now the contractors. If they are not willing to provide a written declaration, you could probably take that to indicate they aren’t confident in its safe operation either.

How wrong is wrong?

There is also “okay” and “the way it should be.” Ground fault circuit interrupters (GFCIs) are a good example. They were not required in kitchens until 1987, but we always recommend them because they could save your life. We do see “time capsule” houses, with original kitchens and bathrooms, and the argument could be made that, since everything is original, and it was correct when built, we shouldn’t call out the lack of GFCIs as a defect. Swapping out a receptacle for a GFCI costs about $20; not having them where they could save someone’s life makes no sense, even if it is ‘okay.’

Get it in writing

There’s an old saying in the corporate world: “If it’s not in writing, it never happened.” Verbal assurances are worthless. Sometimes when confronted with a request to “please put that in writing on your letterhead for me,” contractors will backpedal and come back with, “Well…you know, the inspector is technically right; that probably should be fixed.”

If you do get the written assurance, it should go in your files along with other important house documents so you can show it to future buyers, or in case the issue in question does cause a problem down the road

September 10, 2013/2 Comments/by alansinger
https://www.sterlinghomeinspections.com/wp-content/uploads/sites/57/2013/09/Sterling Home Inspections Corroded Panel.jpg 510 500 alansinger https://d3bfc4j9p6ef23.cloudfront.net/wp-content/uploads/sites/57/2018/11/07195401/logodark.png alansinger2013-09-10 01:28:592021-12-29 22:04:41“There’s absolutely nothing wrong with it!”
Uncategorized

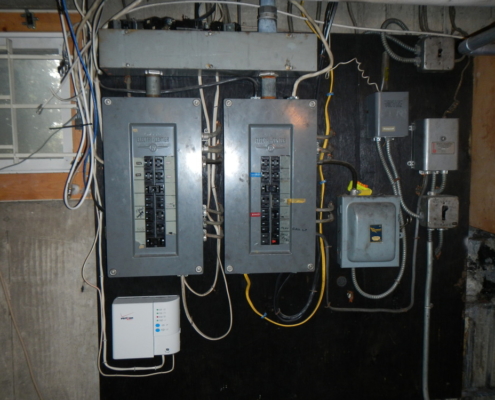
Whats So Special About My Electrical Panel ??

We never think about it. Yet it serves us every day.  It is the largest safety device in your home, but most do not appreciate what is does.

It is your electrical service panel. It is the heart of the home electrical system and is in essence the heart of our modern lifestyle.  Every year that goes by we require it to do more and more.

If you went to your main service panel and shut off the main breaker what would your life be in your home? No lights, no heat, no cooking, no TV so on… and so on.

As a home inspector I had a curious thought. Why is it when I recommend a panel be replaced it becomes more of an issue than other components of the home?

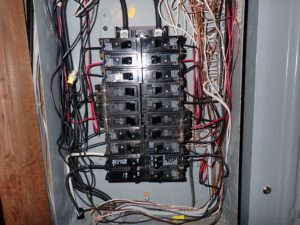
Open Electrical Panel

As home inspectors we often cite that a roof need replacement or if an air conditioner or heat pump is old it is ready for replacement, or your water   heater needs replacement. Most people understand and are used to the thought that these types of components reach the end of a useful lifespan and should be replaced.

But the main service panel, now that is a different story. This seems to get homeowners and some realtors get a little jumpy. They start to question my recommendation and ask more questions.

This brings me to my main point. Service panels and their associated components were built for the time they were installed.  As such they were not designed in many ways for our modern lifestyles and demands. Americans use more electrical power per person than do people of any other country in the world, but that does not mean that we have a better understanding of electricity.

Safety features and design requirements have been developed, improved and implemented in newer installations.

Through time many of these older panels become overcrowded and their initial design was poor at best. Time is not a friend of electrical systems, and they should be replaced. So here is a thought, roof replacement cost is about 6-7 k and up. An air conditioner/heat pump can be 2-3k and up. The cost to replace a service panel is usually in the $1200 to $1500 range.

I know this is not cheap, but this is the one component that may save your life. A roof leak is bad but it most likely will not kill you. If your service panel catches fire or does not properly function it may have a devastating consequence.

Now I acknowledge that the events that have to happen to create a life-threatening situation is a low probability, but this is a safety device. It is like the airbag in your car, you sure hope to never need it but you will be glad it is there in the event of an accident.

Pushmatic Electrical Panels in Basement

Pushmatic Electrical Panels in Basement


The NFPA reported in 2009, an estimated 44,800 home structure fires reported to U.S. fire departments involved some type of electrical failure or malfunction as a factor contributing to ignition.  These fires resulted in 472 civilian deaths, 1,500 civilian injuries, and $1.6 billion in direct property damage. NFPA electrical fires report.

A study conducted by the U.S. Consumer Product Safety Commission (CPSC) in the 1980s indicated that the frequency of fires in residential electrical systems was disproportionately high in homes more than 40 years old. The thought is that the aging of older electrical systems, combined with the fact that older homes were not built to the more rigid building codes of recent times, were deemed the most likely contributing factors.

If you have a panel manufactured by Zinsco, Federal Pacific Electric (FPE) or even Bryant, these panels have a reputation for being problematic and a potential safety hazard and should be replaced sooner versus later but any electrical system 40 years or older needs a thorough evaluation.

As home inspectors we are hired to provide information. There is no pass or fail of a home. We all assume some risk but understanding that risk will help you make a better decision.


May 24, 2013/5 Comments/by alansinger
https://www.sterlinghomeinspections.com/wp-content/uploads/sites/57/2013/05/How-to-Tell-if-an-Electrical-Panel-is-Overloaded-.jpg 500 374 alansinger https://d3bfc4j9p6ef23.cloudfront.net/wp-content/uploads/sites/57/2018/11/07195401/logodark.png alansinger2013-05-24 01:39:102021-12-29 23:33:05Whats So Special About My Electrical Panel ??
Page 1 of 212

Recent Posts

  • Is My Range In Danger Of Tipping Over?
  • Realtor.com writer taps Sterling Home Inspections for input on article about “7 Things Your Home Inspector Wishes You Knew”.
  • 7 Things Your Inspector Wishes you Knew
  • So You’re Having Your Home Inspected – How to Prepare
  • Sterling Home Inspections New Promotional Video

Instagram

Follow Me!

Proudly Providing Home Inspection Services

Sterling Home Inspections offers Pre-listing Inspections,  Construction Phase Inspections, New Home Inspections, Water Quality Testing, Radon Testing and Termite Inspections in Westchester County NY and Fairfield County Connecticut

Schedule Inspection Service Areas

THE VERY BEST FOR YOUR HOME – STERLING HOME INSPECTIONS

alan@sterlinghomeinspections.com

(914) 413-7781

22 Oxford Road, White Plains NY 10605

NY State Home Inspection License # 16000058241 | CT State License # 000756 | NY DEC Pest Control License # T3883064

ARMONK, BEDFORD, RYE, LARCHMONT, SCARSDALE, KATONAH, POUND RIDGE, TARRYTOWN, IRVINGTON, NEW ROCHELLE IN WESTCHESTER NEW YORK.
GREENWICH, STAMFORD, WESTPORT, DARIEN, NEW CANNAN, FAIRFIELD AND WILTON IN FAIRFIELD CONNECTICUT.

STERLING HOME INSPECTIONS IS A FEATURED INSPECTOR AT:


© Copyright Sterling Home Inspections - Website by Spectora
  • Link to X
  • Link to LinkedIn
  • Link to Facebook
  • Link to Instagram
  • Link to Yelp
  • Link to Youtube
  • For Agents
  • Contact
  • Service Area
  • Video Page
  • Your Report
Scroll to top Scroll to top Scroll to top